What you set up first
Three things have to exist before anyone can punch in.1
Give every employee a punch code and a wage
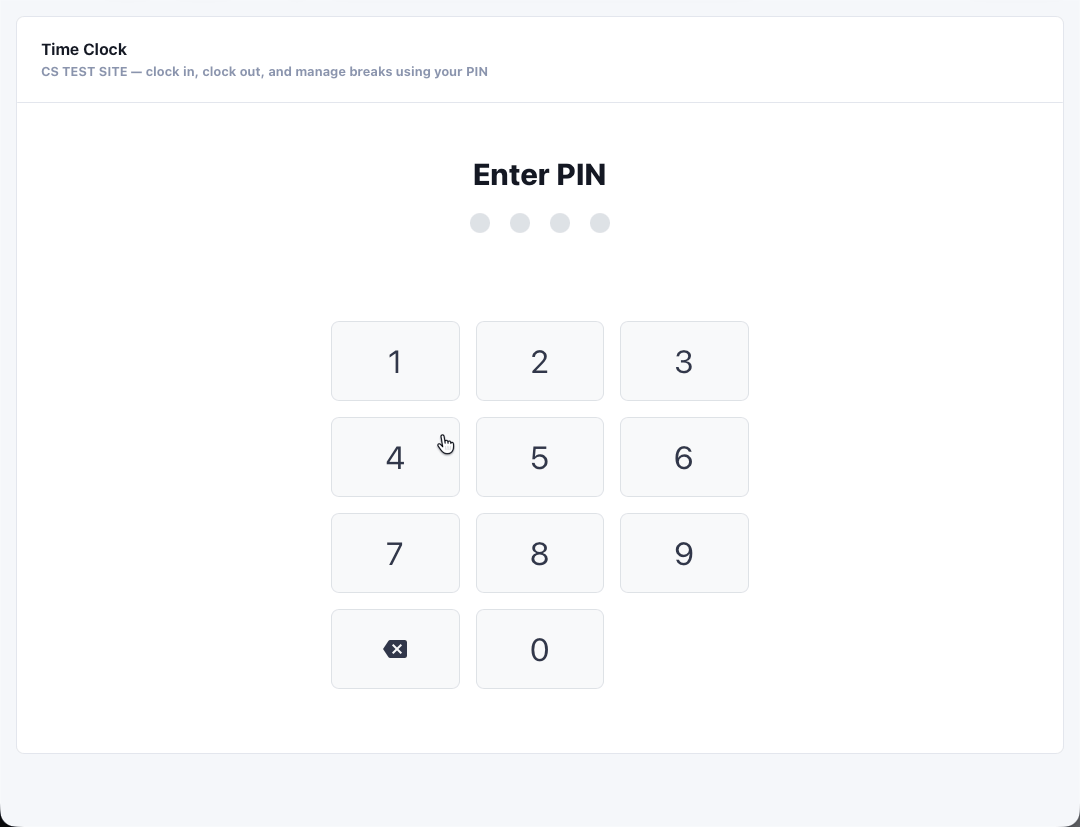
Go to Employees and open an employee, or create a new one. Punch Code is a required 4 digit code and it is what the employee enters at the kiosk.
Turn on Include in Schedule Builder for anyone you want to schedule. Scheduled employees appear as rows in the weekly schedule builder. Clearing the checkbox does not stop them clocking in at the kiosk.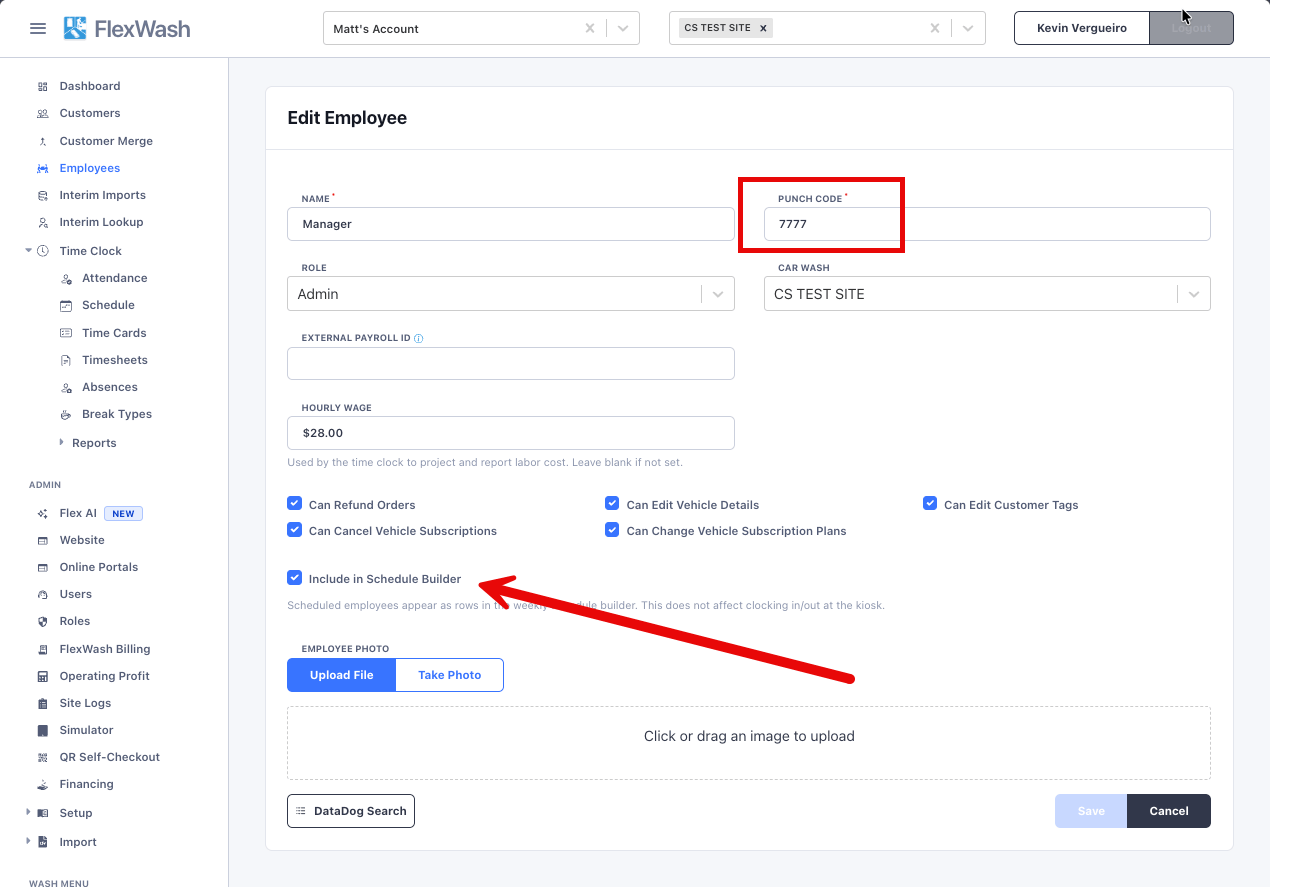
2
Create your break types
Go to Time Clock > Break Types and select Create Break Type. Each break type has a title, a paid or unpaid setting, and a length in minutes, for example a 30 minute unpaid meal break and a 10 minute paid rest break. These are the breaks employees can clock into at the kiosk.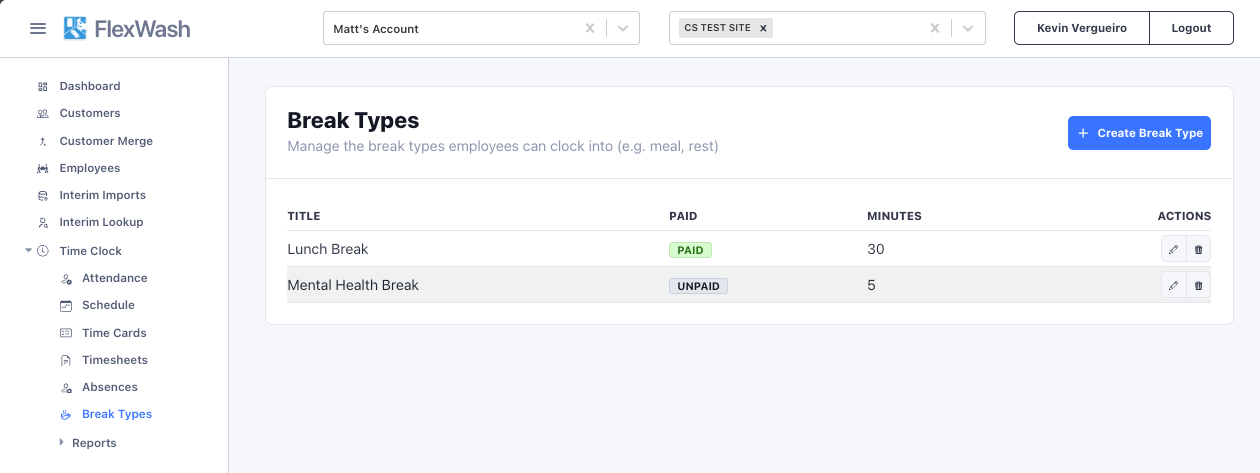
3
Turn on the clock-in kiosk
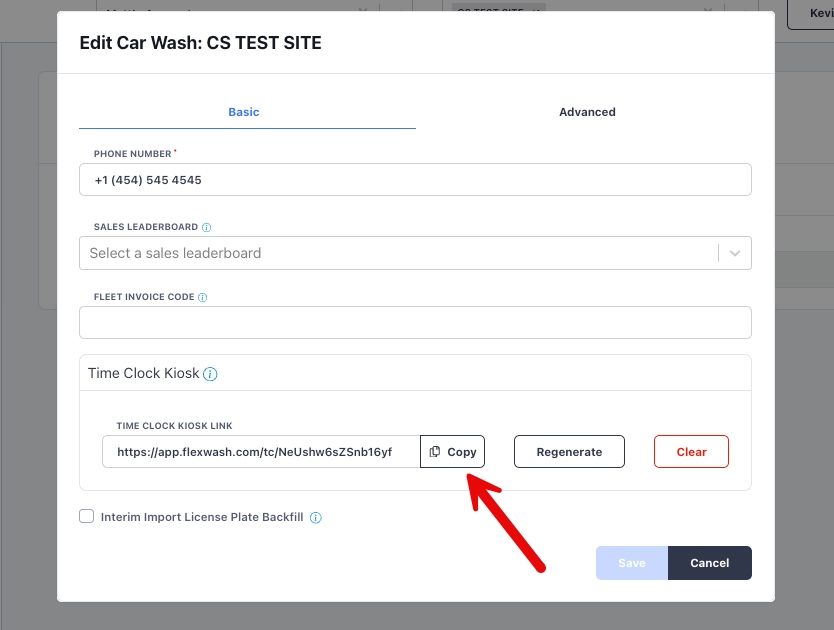
The kiosk link does not live under Time Clock. Go to Setup > Car Washes, open the car wash, and find the Time Clock Kiosk section on the Basic tab. Select Copy to take the link, then open it on the tablet, phone, or computer your crew will punch from.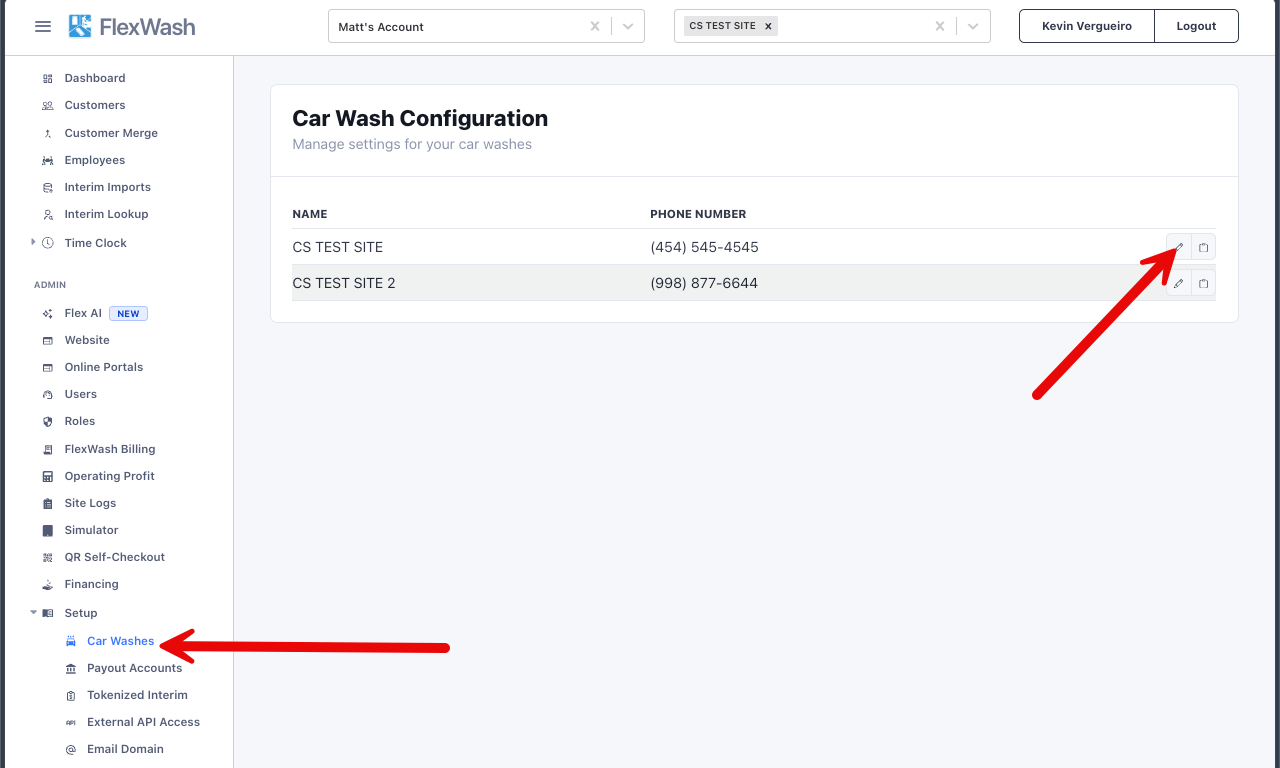
Build and publish a schedule
Go to Time Clock > Schedule to open the Schedule Builder. It shows one week at a time, one row per scheduled employee, and a Labor Cost row across the bottom.- Pick the week with Previous and Next. Weeks run Monday to Sunday.
- Select + Add in a day cell to place a shift, or select Copy Prior Week to carry last week’s pattern forward.
- Select Save to keep your work. The week stays marked DRAFT.
- Select Publish when the schedule is final.
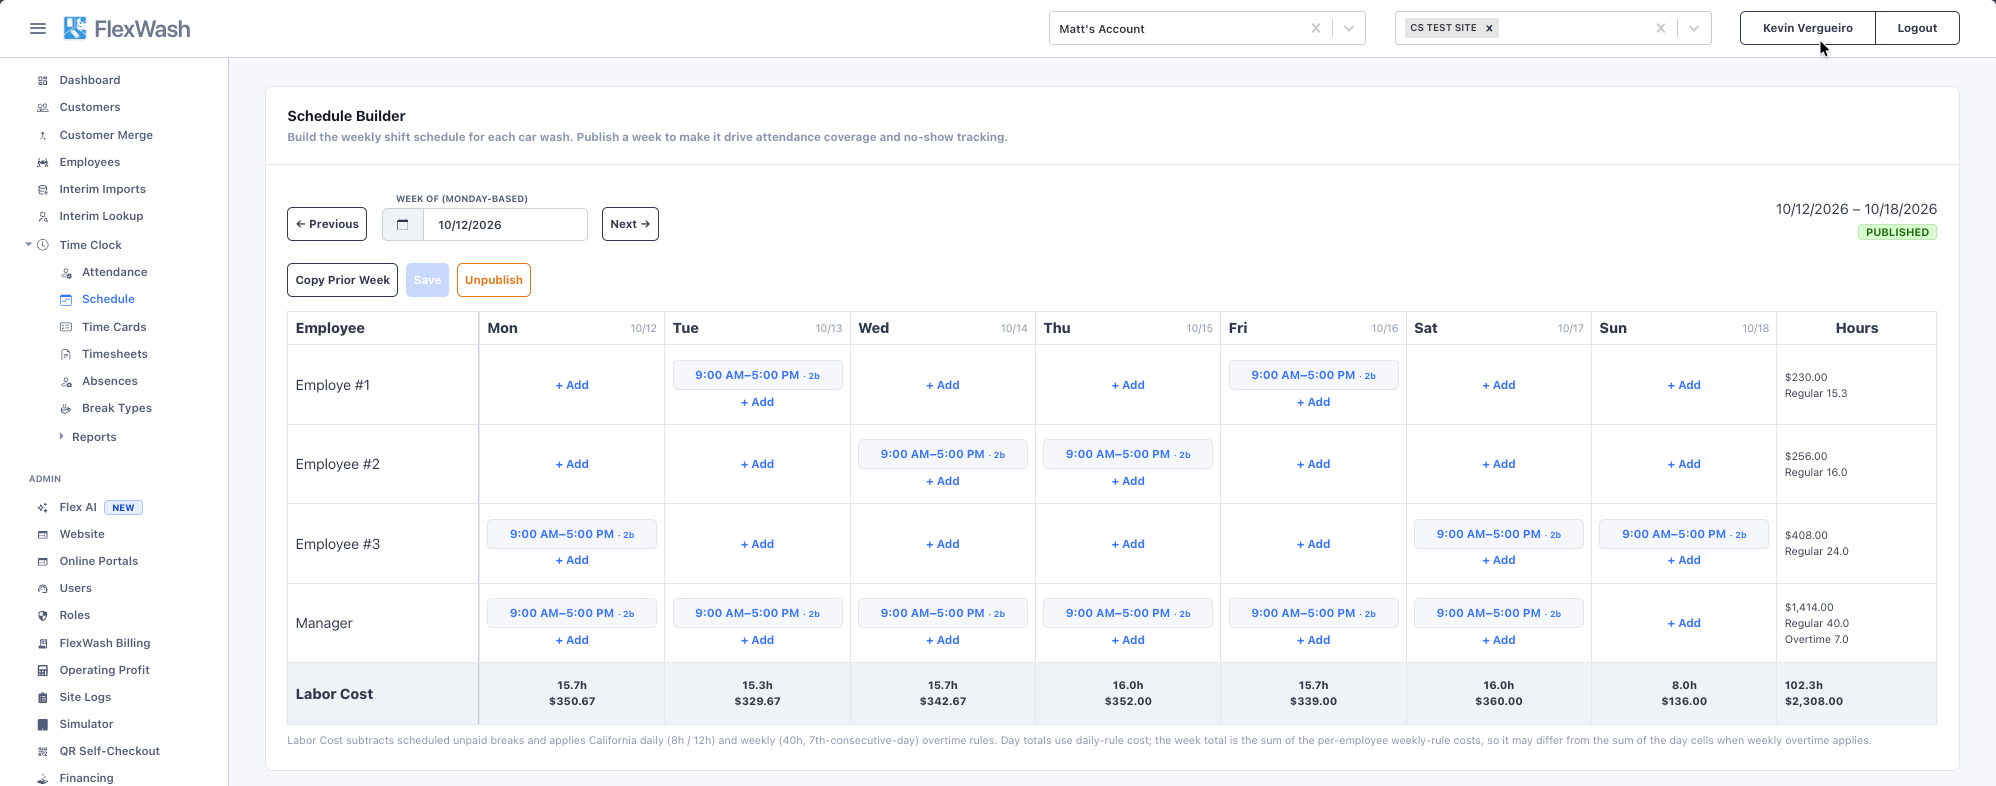
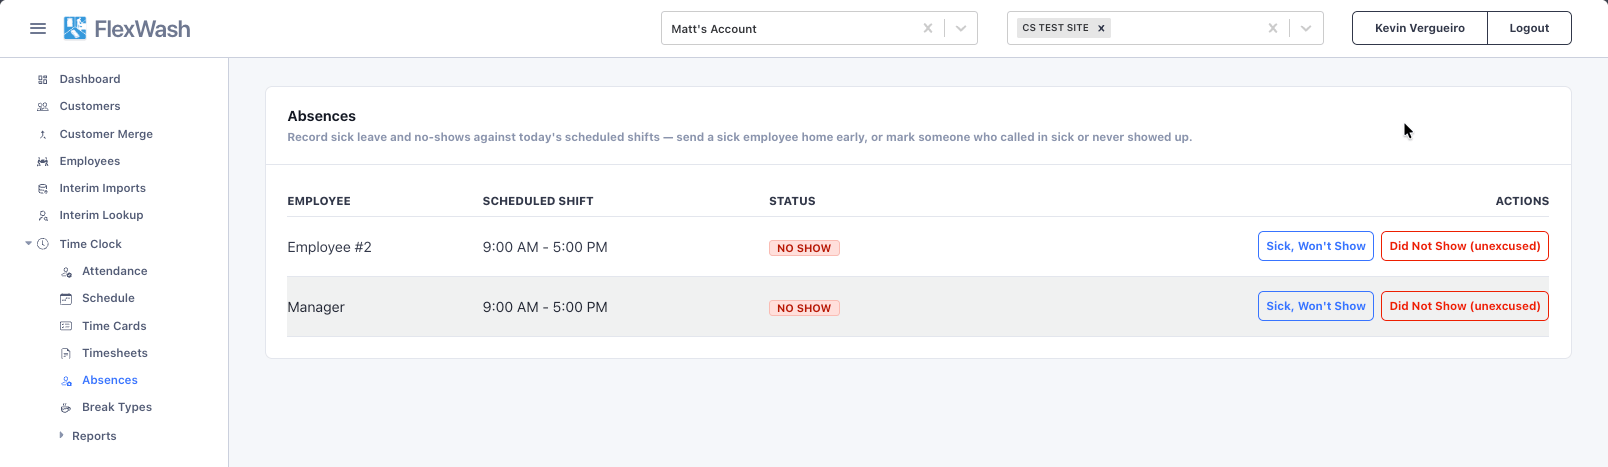
Publishing is what makes the schedule count. A published week drives scheduled coverage on the Attendance page and the late and no show tracking that goes with it, and absences can only be recorded against a published schedule. A saved draft week is yours to keep editing and tracks nothing.
Run the day
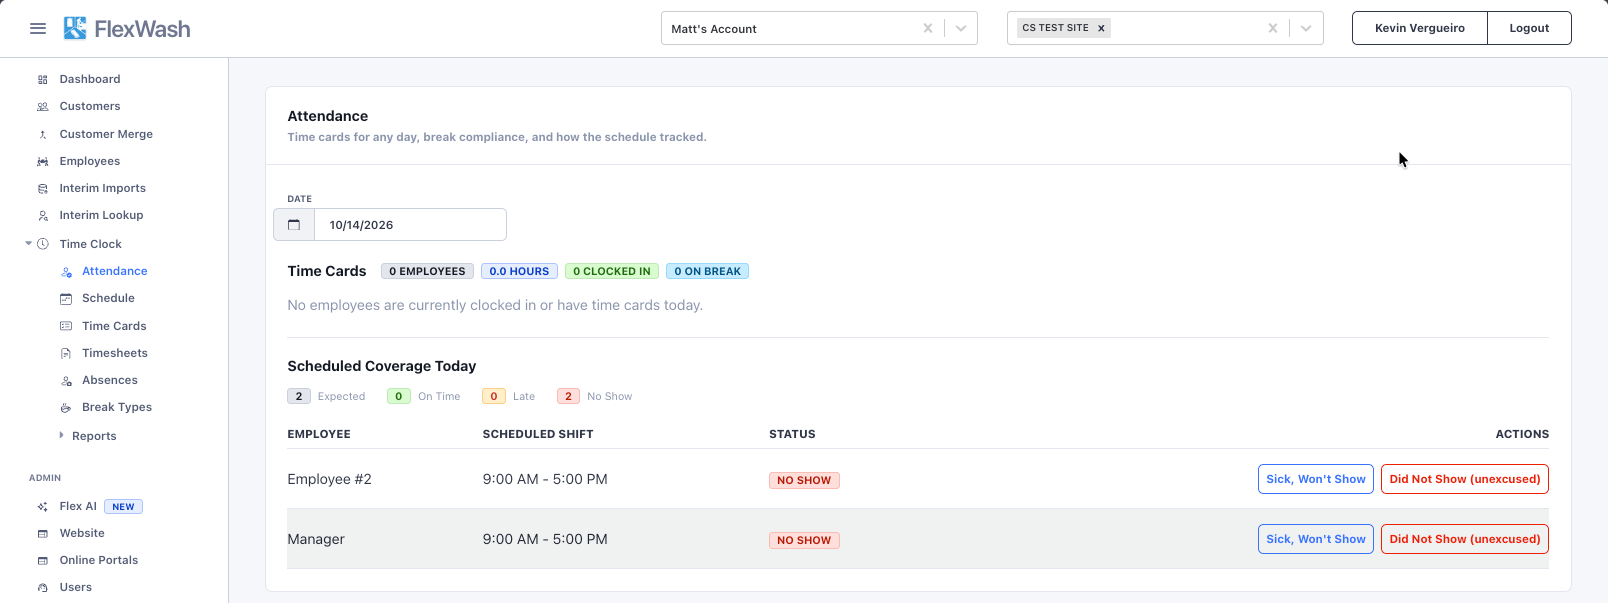
Time Clock > Attendance is the screen to keep open. Pick a date and it shows:- Time Cards for that day, with a count of employees, total hours, who is clocked in, and who is on break.
- Scheduled Coverage, counting who was Expected, On Time, Late, and No Show against the published schedule.
Fix punches and close out the pay period
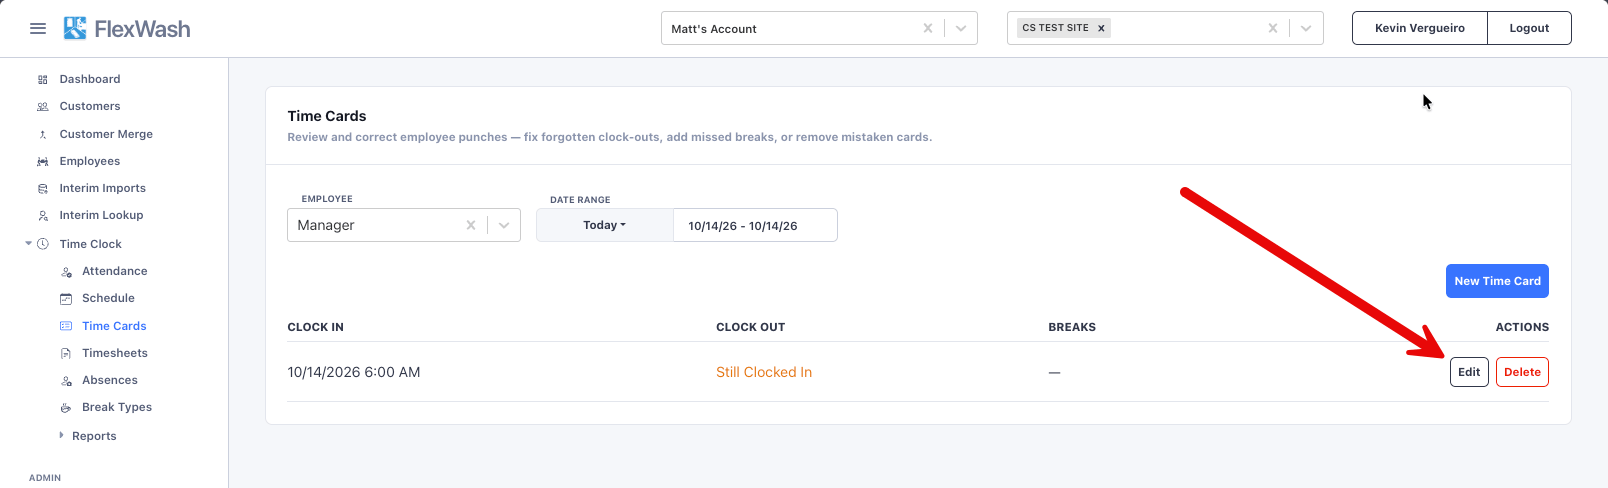
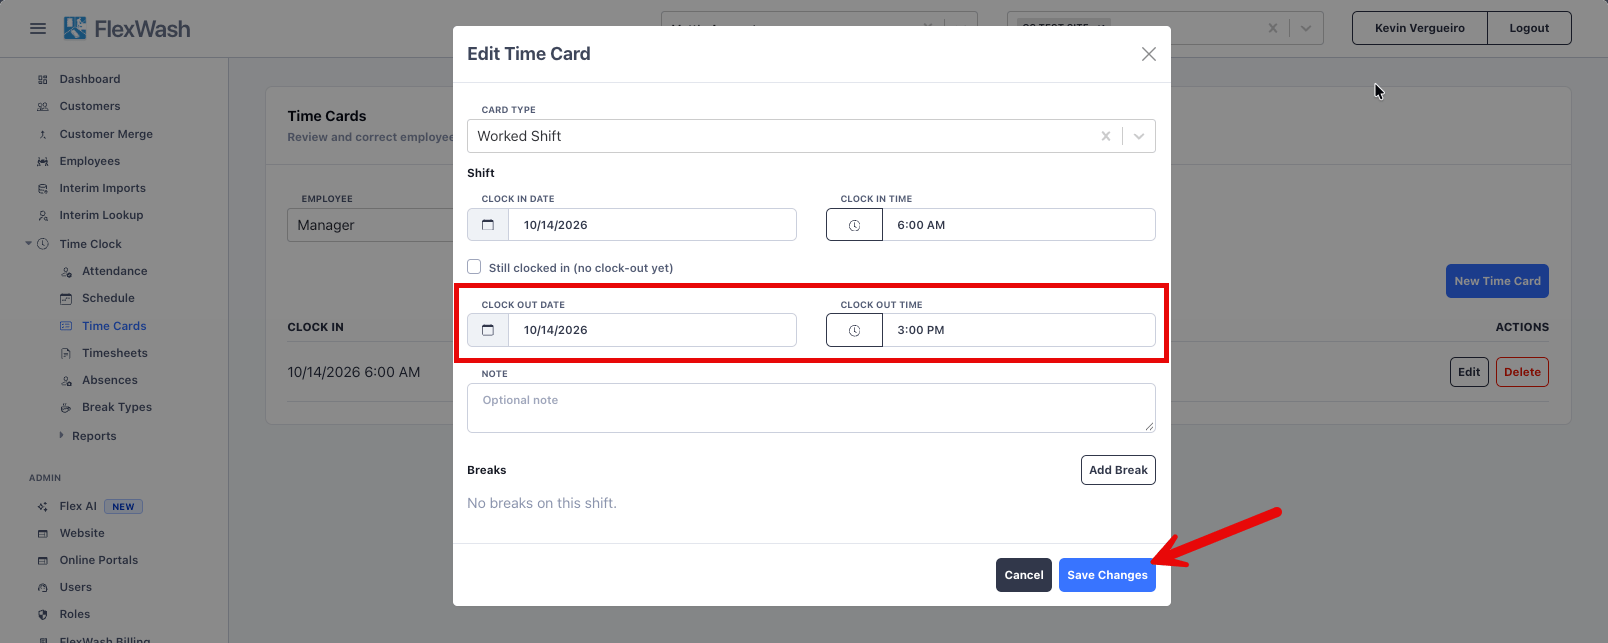
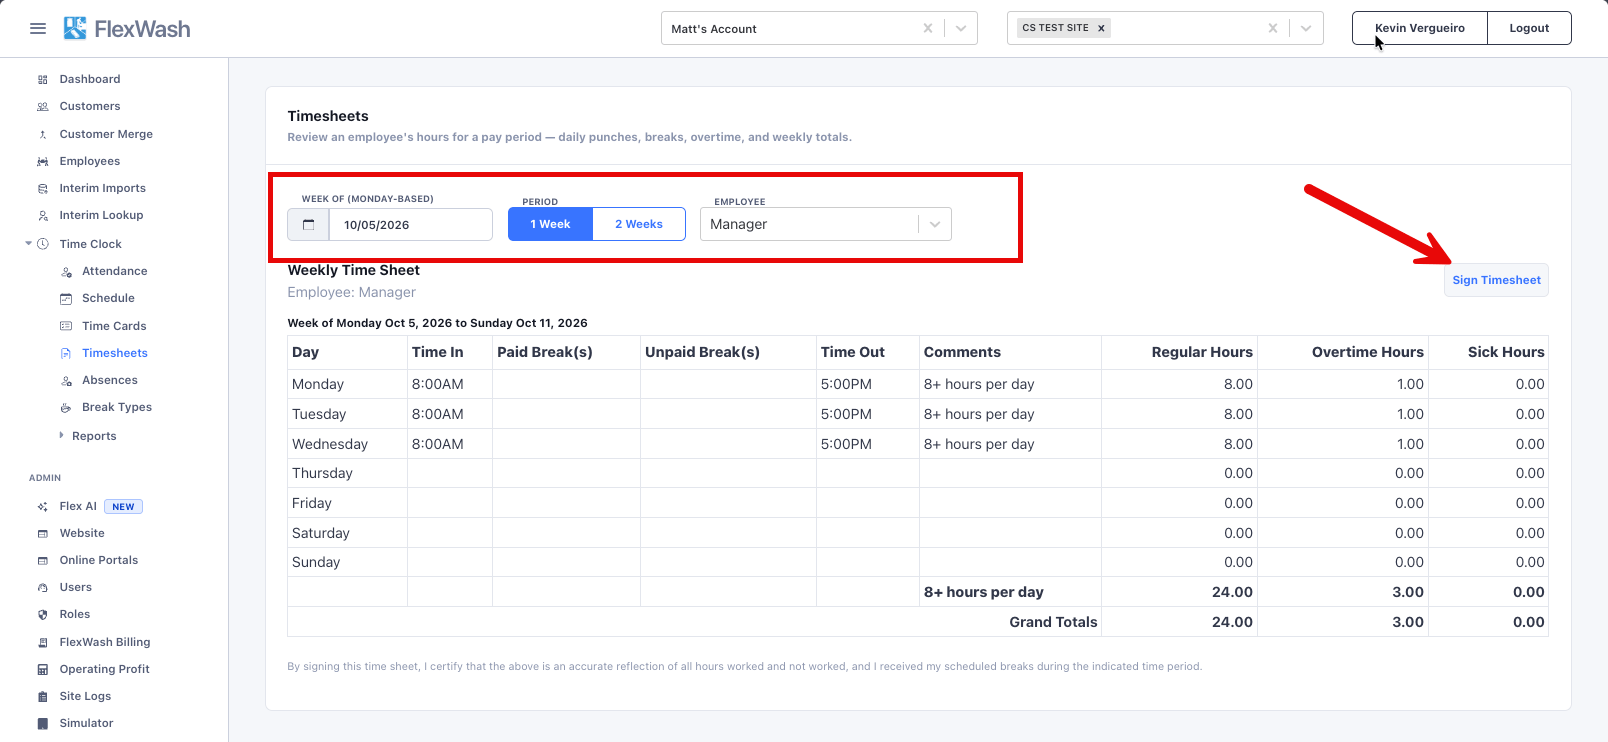
Time Clock > Time Cards is where you correct what the kiosk captured. Pick an employee and a date range, then fix forgotten clock-outs, add a missed break, or remove a time card created by mistake.